Copy the connection and credentials
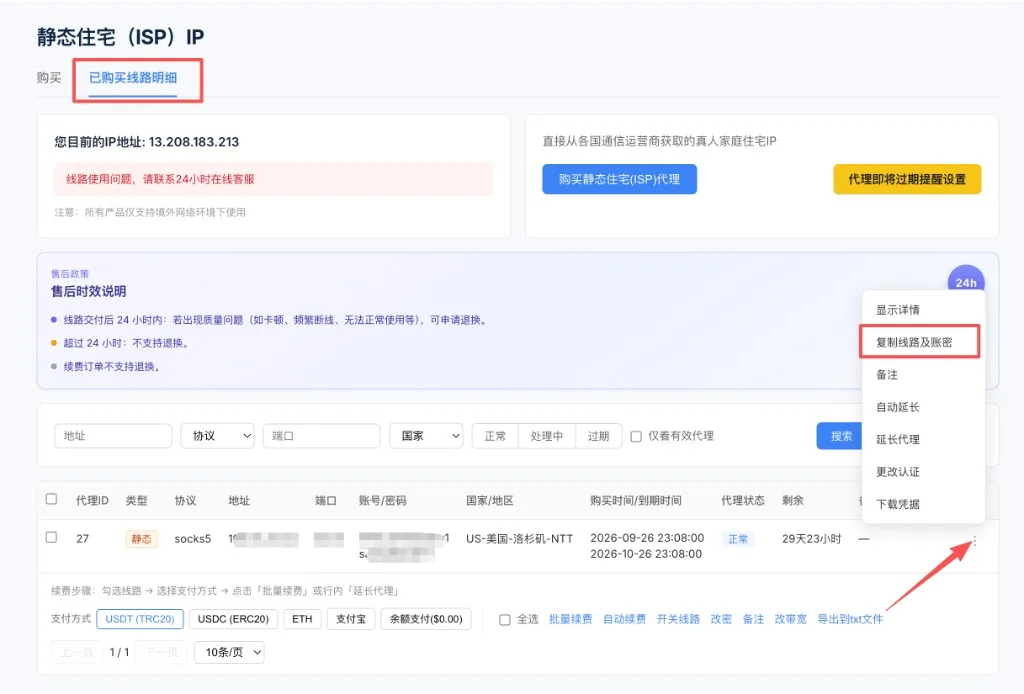
After buying a proxy, open the purchased connection details page (「已购买线路明细」 on the provider's site), click the "more" menu on the right, and choose 「复制线路及账密」 (copy connection and credentials).
Copy the connection and credentials from your provider, parse and save them in TGEgg, then test the connection. Three steps and you're ready to go.
After buying a proxy, open the purchased connection details page (「已购买线路明细」 on the provider's site), click the "more" menu on the right, and choose 「复制线路及账密」 (copy connection and credentials).
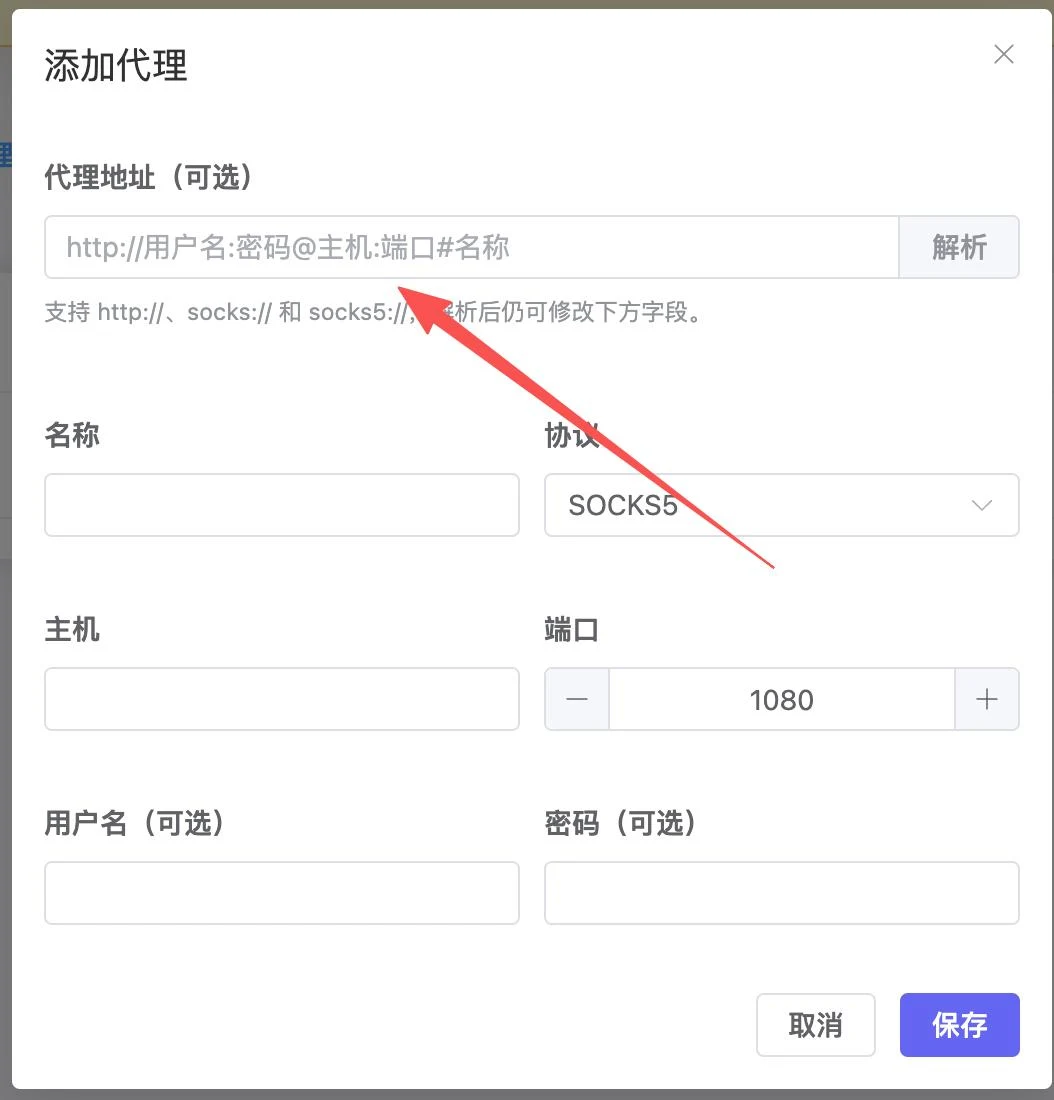
Go to "Proxies" in TGEgg and click "Add proxy". Paste the full address into "Proxy address", then click "Parse" and then "Save".
After saving, click "Test" in the proxy list. Once you see "Connected" and the egress IP, the proxy is ready to use.
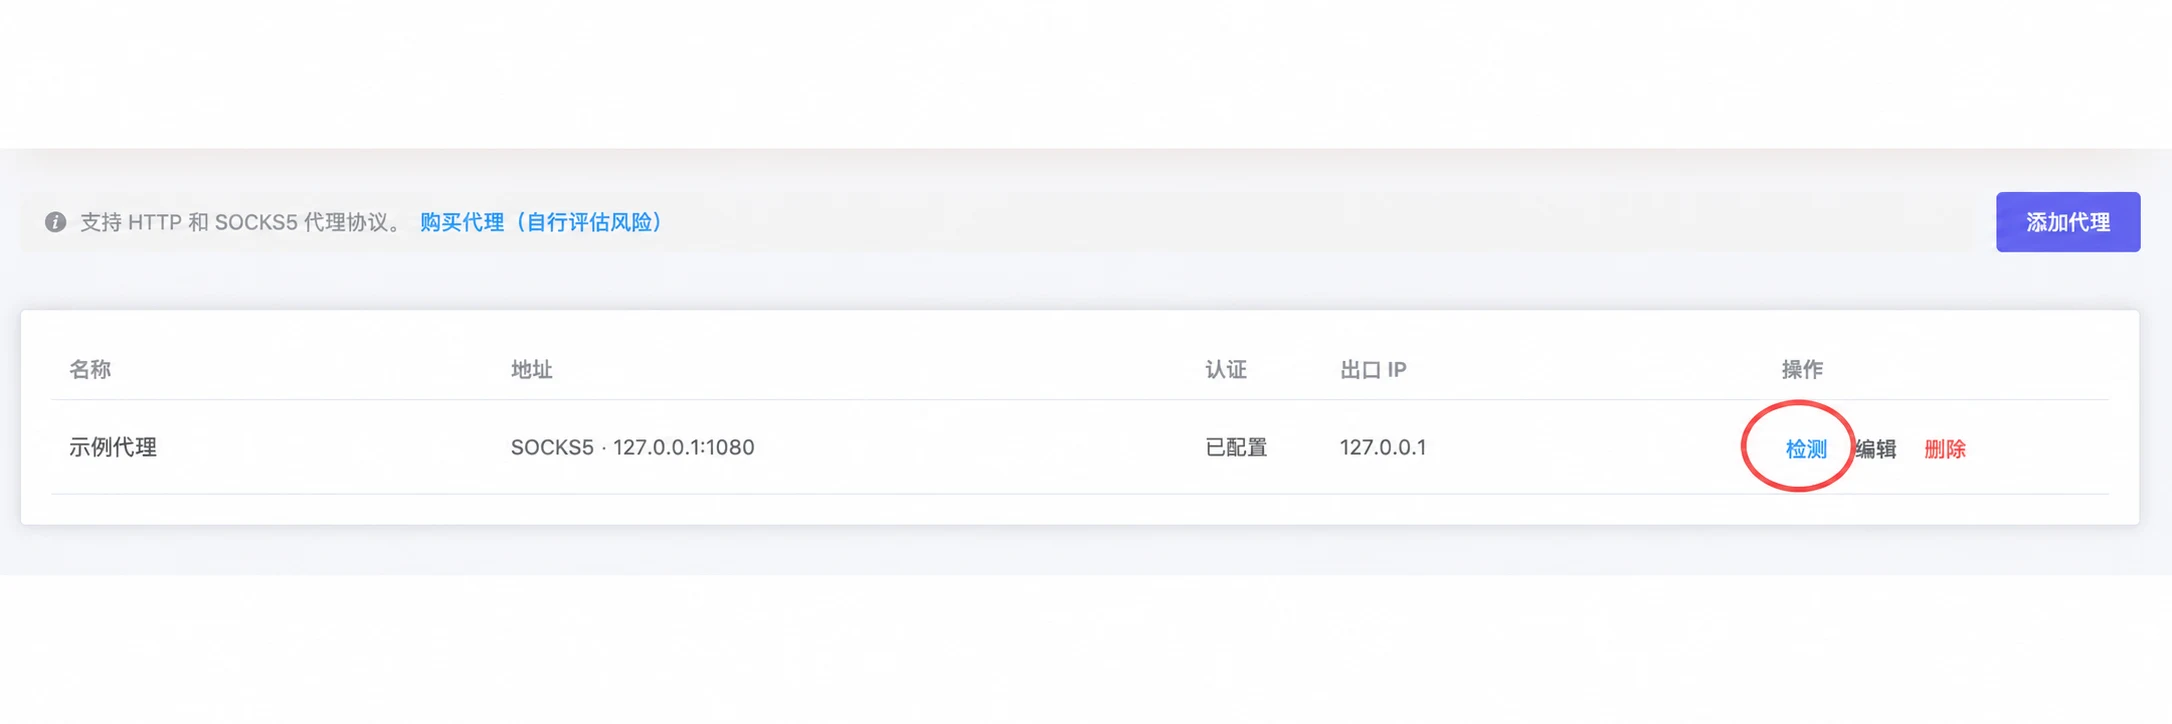
If the test fails, double-check the proxy address, username, password and port, or ask your proxy provider to confirm the connection status.